Version 1.0.0.dmg · 2.7 MBmacOS 14 Sonoma or later · Apple silicon
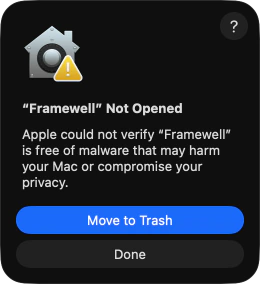
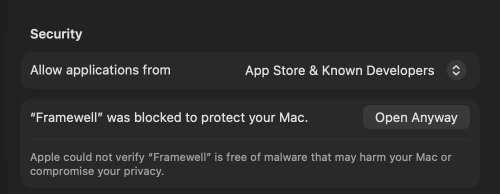
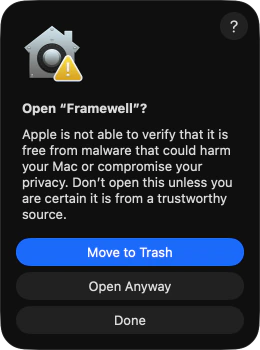
Framewell is not notarized by Apple, so macOS stops it the first time you open it. That's expected and takes a minute, once. Step 2 walks you through it.
In place
The capture stays where it is while you annotate it.
Offline
No account, no network connection, no analytics.
Light
About 4 MB on disk, ~20 MB of memory, no CPU while idle.
Every display
Capture on any screen. The others stay usable while you edit.
⌜ Features ⌟
Six things it does well. Each a keystroke away.
1⌥⇧AOption Shift A
Capture
Every display freezes. Drag an area, click a window, or click the desktop for the whole display.
Windows keep their shadow on a transparent background. Shift-click several to capture them together.
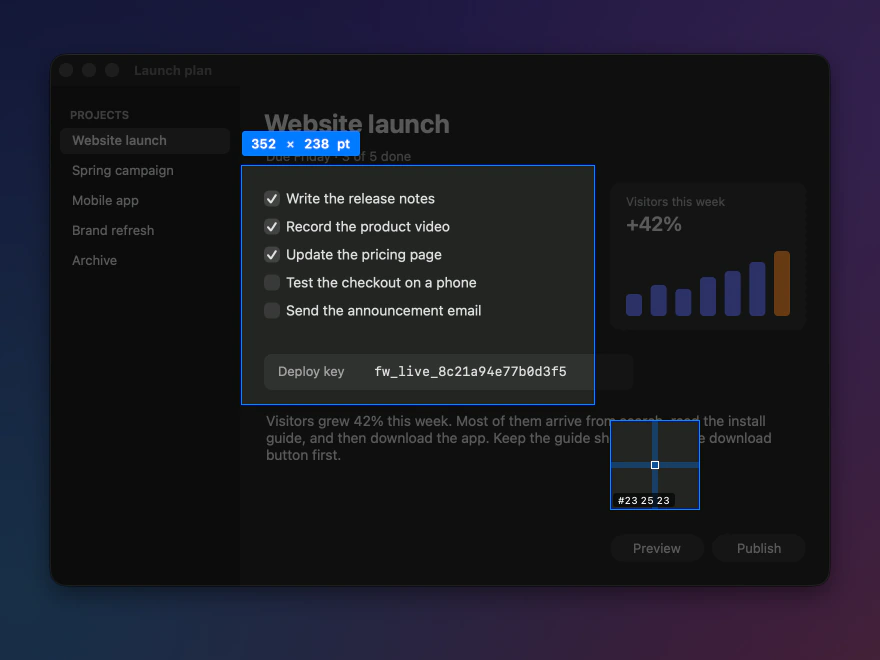
A pixel magnifier follows the crosshair. Press C to copy the color as HEX, RGB, rgba, NSColor, UIColor or SwiftUI Color.
Size in points, pixels, millimetres or inches. Lock the ratio, type an exact size, nudge with arrow keys.
2R or 1 · A or 4 · …R or 1, A or 4, and so on
Annotate
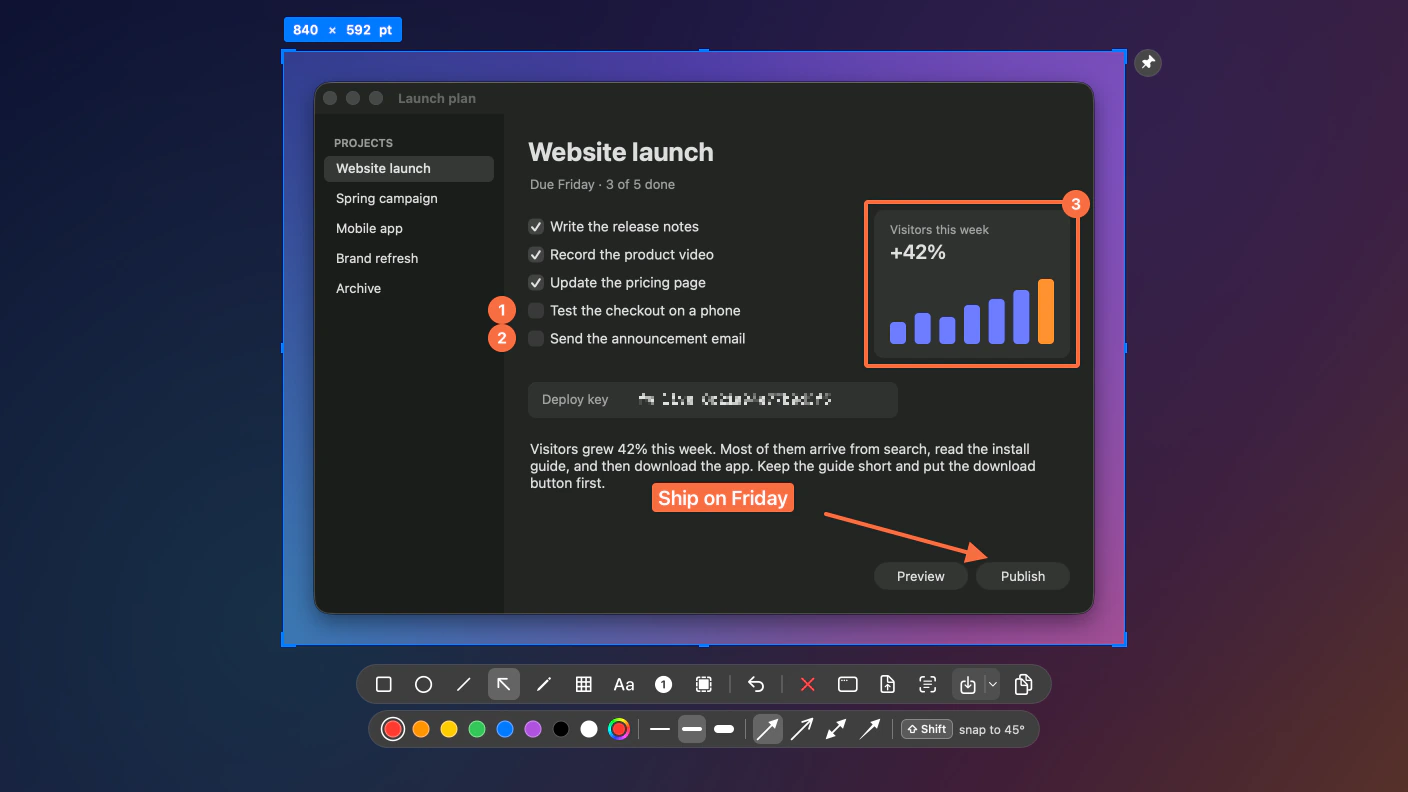
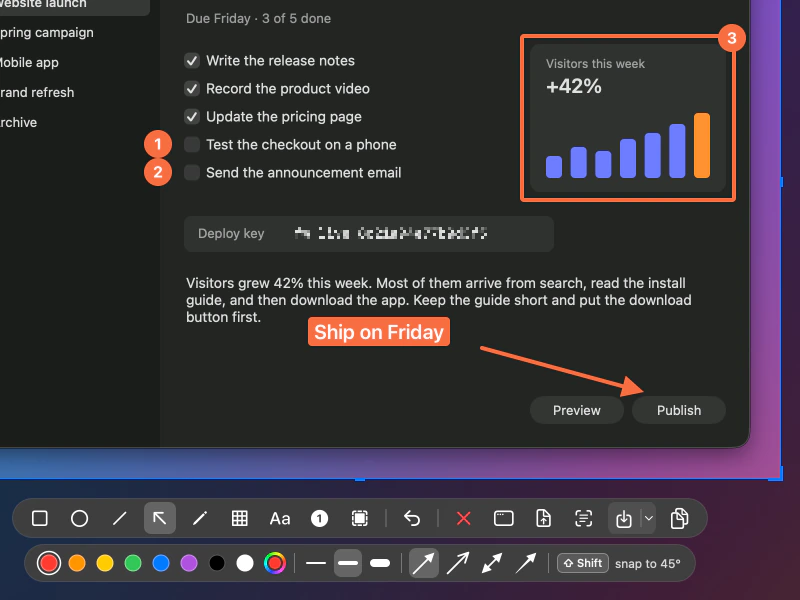
Nine tools, right on the capture. Every mark stays editable, even with another tool active.
Rectangle
Ellipse
Line
Arrow
Pencil
Mosaic
Text
Numbered steps
Highlight
Numbered steps count themselves and can carry notes, added as a column next to the image.
Highlight dims everything except the areas you mark. Undo and redo up to 200 steps.
Each tool has a letter and a number key: R or 1 for rectangle, A or 4 for arrow.
3⌥⇧POption Shift P
Pins
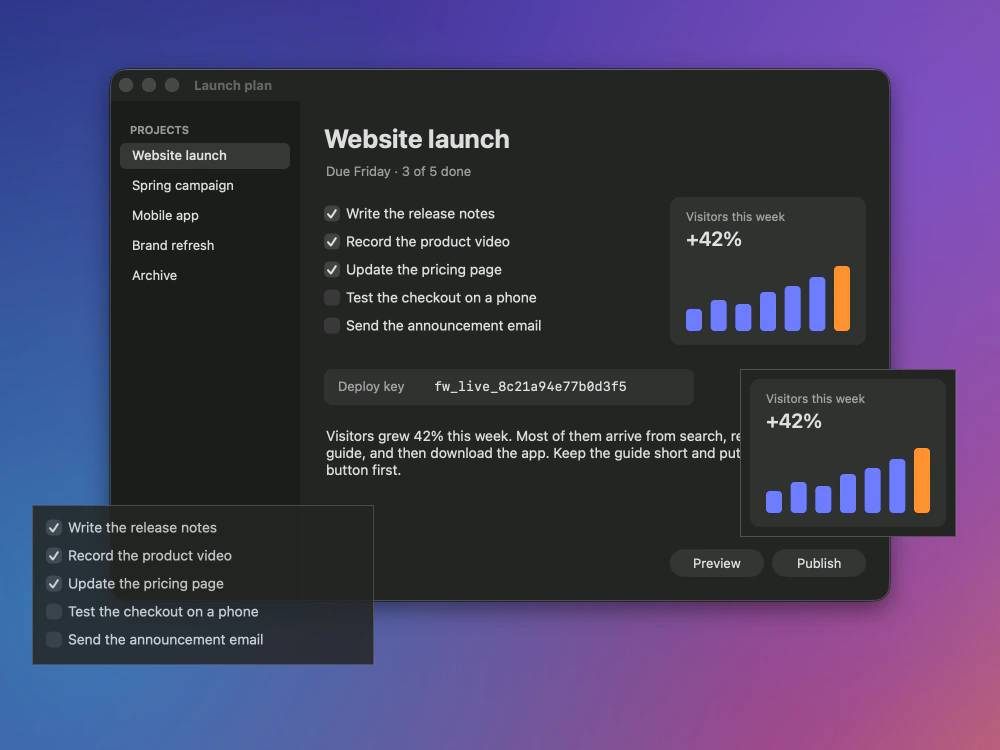
Float a capture, the clipboard image or a file above every other window, including full-screen apps.
Drag to move. Scroll or pinch to zoom from 10 to 400 %.
Option-scroll for opacity. Optional click-through.
4⌥⇧SOption Shift S
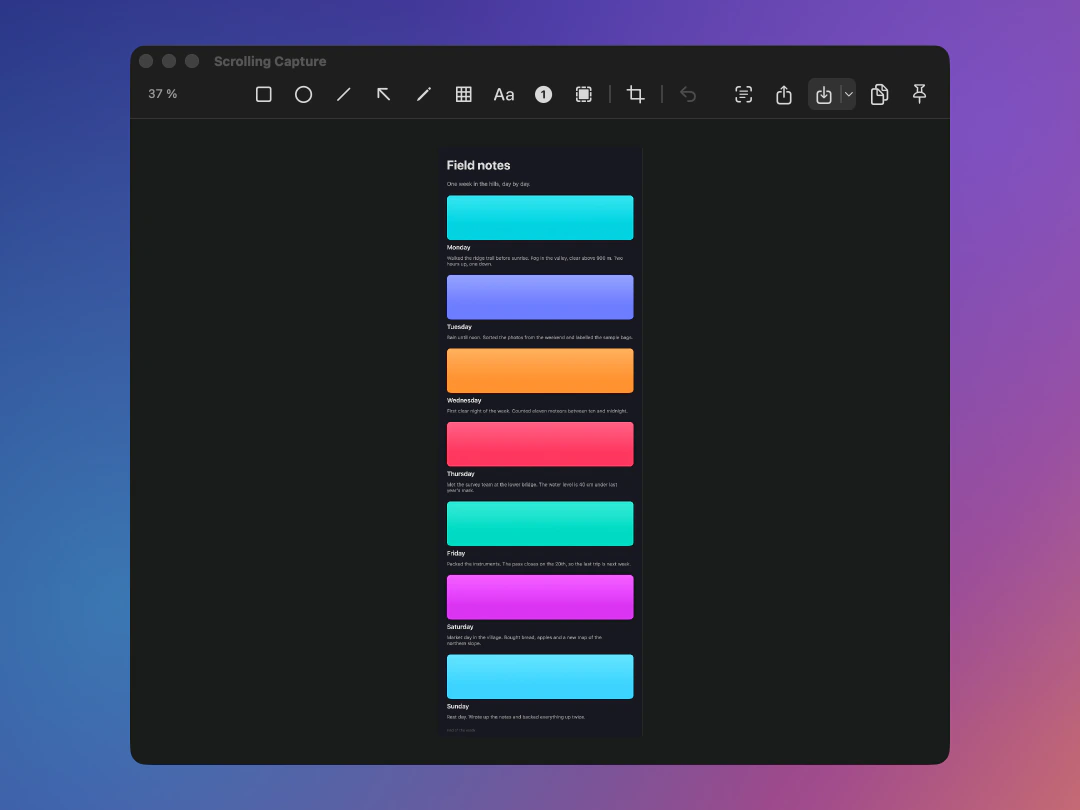
Scrolling capture
Scroll yourself, or let Framewell scroll for you. The frames become one long image, up to 40,000 pixels tall, opened in the editor.
Sticky headers and footers are kept once.
It captures downward only, and video or animation inside the area can confuse the stitching.
5⌥⇧TOption Shift T
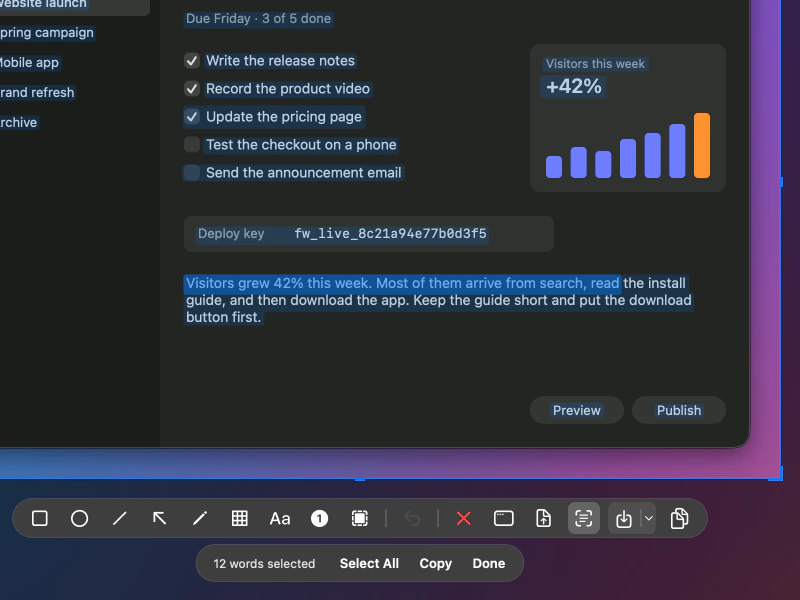
Text recognition
On-device, with Apple's Vision framework. English and Russian by default; other languages macOS supports in Settings.
Quick mode. Drag over text and it is on the clipboard.
Select mode. Click Recognize Text in any capture and select words like in a document.
6↩ · ⌘C · ⌘SReturn, Command C, Command S
Save and share
Return, Space or ⌘C copies. ⌘S saves. Preview, the share menu, a pin or the editor window are one click away.
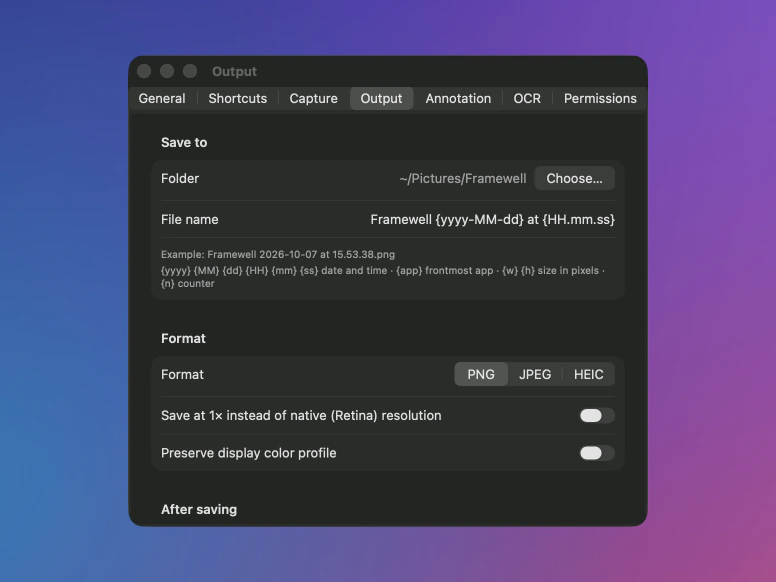
PNG, JPEG or HEIC, at native Retina resolution or 1×, named from a template.
Optionally keep the unedited original alongside.
The editor window annotates existing files or the clipboard image, with crop and zoom.
⌜ Shortcuts ⌟
Two fingers on ⌥⇧. One key for the rest.
All shortcuts can be changed in Settings → Shortcuts.
Option Shift A:⌥⇧ACapture an area, a window or a display
Option Shift F:⌥⇧FCapture the display under the pointer
Option Shift S:⌥⇧SScrolling capture
Option Shift T:⌥⇧TRecognize text in a region
Option Shift R:⌥⇧RCapture the last region again
Option Shift P:⌥⇧PPin the image on the clipboard
Option Shift E:⌥⇧EAnnotate an image file
⌜ Privacy ⌟
Highlight
Your screenshots go only where you send them.
No networking code.The app is fully offline.
No account.Nothing to sign in to, nothing collected.
Your folder.Saves to Pictures/Framewell by default.
⌜ Install guide ⌟
macOS will stop it once. Here's how to get past.
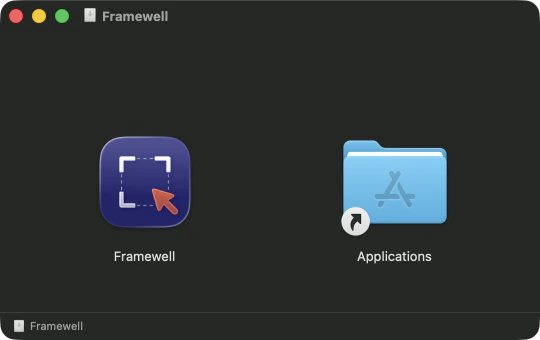
Framewell is not notarized by Apple, so macOS will stop it the first time you open it. This is expected and takes a minute to get past, once. Open this page on your phone and tick off each step as you go.
The pictures are real screenshots, taken on macOS 26. Earlier versions look a little different.
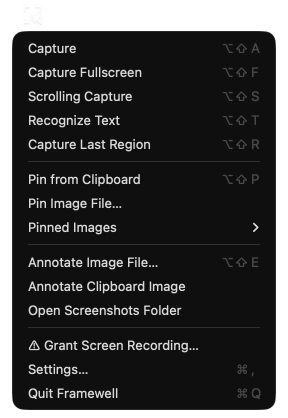
Framewell now sits in the menu bar at the top right of the screen. It has no Dock icon and no window. Click its menu bar icon, corner brackets with a pointer, for the menu and Settings.
The icon and its menu. Grant Screen Recording… stays in the list until step 5 is done.
Allow screen recordingRequired
Without it, macOS only lets the app see an empty desktop.
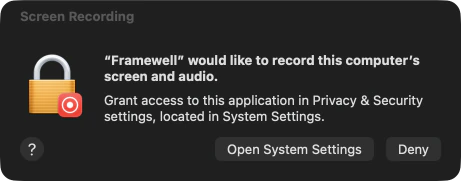
Press ⌥⇧AOption Shift A for a first capture. macOS asks for permission: click Open System Settings.
The request. If you dismissed it, choose Grant Screen Recording… in Framewell's menu, then Open System Settings.
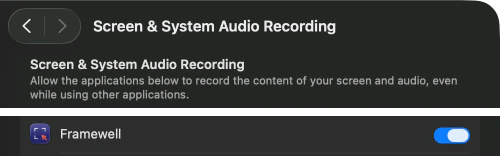
In Screen & System Audio Recording (called Screen Recording on macOS 14), switch Framewell on.
System Settings → Privacy & Security → Screen & System Audio Recording. Your other apps in the list are left out of this picture.
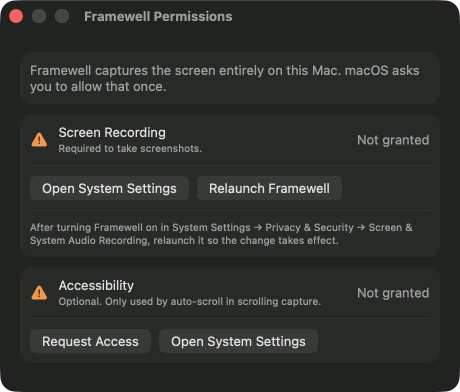
Quit and reopen Framewell so the change takes effect. The Framewell Permissions window, which opened along with the request, has a Relaunch Framewell button for this.
Framewell's own window. The same controls are in its Settings → Permissions.
On macOS 15 and later, the system may ask again from time to time whether Framewell may keep this access. Choose to keep allowing it.
AccessibilityOptional
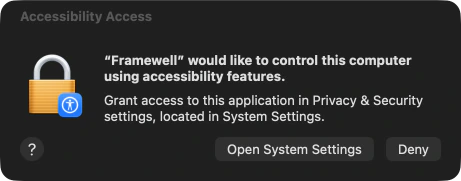
Only the auto-scroll option of scrolling capture needs it. Framewell asks the first time you switch auto-scroll on (System Settings → Privacy & Security → Accessibility).
The request, should you want auto-scroll. Everything else works without it.
Launch at loginOptional
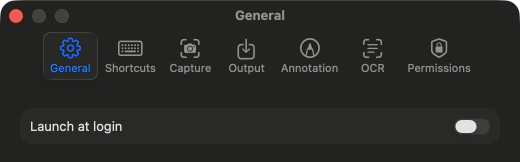
Switch on "Launch at login" in Framewell's Settings → General.
Framewell's Settings, opened from its menu.
⌜ Troubleshooting ⌟
If something looks off.
macOS says the app is damaged or can't be opened.+
The download is still quarantined. Follow step 3, or use the Terminal command.
Captures show only the wallpaper or are black.+
Screen recording is not allowed yet, or Framewell was not reopened after allowing it. Repeat step 5.
The shortcut does nothing.+
Another app may use the same shortcut. Change it in Settings → Shortcuts.
Where is the app? There is no window.+
It is in the menu bar, at the top right of the screen.
Does it work on Intel Macs or macOS 13?+
No. It needs Apple silicon and macOS 14 or later.
Does it send my screenshots anywhere?+
No. It has no network access at all.
How do I update?+
Download the new version and replace the app in Applications. If captures come out empty afterwards, switch the screen recording permission off and on again.
How do I uninstall?+
Quit Framewell from its menu and move it from Applications to the Trash.
Press ⌥⇧A. Draw. Done.
For Macs with Apple silicon, running macOS 14 Sonoma or later.